Quick answer
Event capacity planning is the process of turning your venue’s legal maximum into a realistic number of tickets you can actually sell — after subtracting holds, comps, production space, and a safety buffer — and then structuring that number across ticket types, sales phases, and your check-in plan. Get it right and you sell out cleanly without turning anyone away at the door; get it wrong and you either leave revenue on the table or face an overcrowded, unsafe event.
- Your sellable capacity is almost always lower than your venue capacity — plan for holds, comps, staff, and production before you set ticket quantities.
- Overselling to compensate for no-shows only works for free or low-cost events with predictable attendance history; for paid events, use a waitlist instead.
- Capacity is not just a sales number — your door team, check-in speed, and re-entry policy determine whether the number works on event day.
In this guide
- What event capacity planning actually covers
- Start with the hard limits: venue, safety, and staffing
- From venue capacity to sellable capacity
- The no-show math: should you ever oversell?
- Splitting capacity across ticket tiers and releases
- What to do when you sell out
- Capacity on event day: check-in, re-entry, and live counts
- How Tickera helps you control capacity in WordPress
- Capacity planning checklist
- FAQ
What event capacity planning actually covers
Most organizers treat capacity as a single number: “the venue holds 500, so we sell 500 tickets.” That shortcut causes most of the capacity problems you see at real events — comps that were never budgeted for, sponsor blocks that appear at the last minute, a photo pit that eats forty standing spots, and a door queue that backs up because 500 people arrived in the same twenty minutes.
Proper event capacity planning answers four separate questions. How many people can legally and safely be inside the space? How many tickets can you actually put on sale once holds and comps are accounted for? How should that sellable number be divided across ticket types and sales phases? And how will you admit that many people through the door without a bottleneck?
Each question has a different owner — the venue, your budget, your marketing plan, and your door team — which is exactly why capacity planning goes wrong when it is treated as one number decided once. This guide walks through each layer in order.
Start with the hard limits: venue, safety, and staffing
Your ceiling is never negotiable. It is set by the venue’s licensed occupancy, fire code, and insurance terms, and it applies to everyone inside the space: attendees, staff, crew, vendors, performers, and security. A “capacity 500” room with 30 staff and crew inside is a 470-attendee room.
Before you set a single ticket quantity, confirm three things in writing with the venue. First, the licensed occupancy for your specific configuration — seated, standing, or mixed layouts often have different limits for the same room. Second, whether the limit counts staff and crew or attendees only. Third, any per-area limits: a mezzanine, terrace, or side room may have its own cap even if the overall building limit has headroom.
The most expensive capacity mistake is not underselling by fifty tickets. It is the fire marshal doing a headcount at your sold-out event and stopping entry while a hundred paid ticket holders are still outside.
Staffing is the soft version of the same limit. A rule of thumb for general-admission events is one trained door person per 150–200 attendees per hour of expected arrival — fewer if you are scanning digital tickets with a fast flow, more if you are checking IDs or wristbanding. If your staffing plan can only process 400 people during your arrival window, your practical capacity is 400 no matter what the room holds. Our guide to designing a fast door check-in flow covers how to raise that throughput number.
Free tool — Check-in Queue Planner: Capacity isn’t only seats — it’s how fast you can get people through the door. Venuera’s free Check-in Queue Planner simulates your door minute by minute and tells you how many scan lanes to run, your peak queue wait, and how many guests are still outside at showtime — it runs in your browser with no sign-up. Plan your door →
From venue capacity to sellable capacity
Sellable capacity is what remains after you subtract everything that occupies space but does not go on public sale. Skipping this step is how events end up “oversold” without ever selling more tickets than the venue holds.
| Line item | Typical share | Example (500-person venue) |
|---|---|---|
| Licensed occupancy | 100% | 500 |
| Staff, crew, security, vendors | −4–8% | −30 |
| Comps and guest list (sponsors, press, artists) | −2–6% | −20 |
| Production holds (photo pit, accessibility seating, tech desk) | −2–5% | −15 |
| Safety / oversell buffer | −1–3% | −10 |
| Sellable capacity | ~80–90% | 425 |
Two of these lines deserve special attention. Comps grow if you do not cap them — every sponsor, partner, and team member will ask for “just a couple of tickets” in the final week, so set the guest-list allocation early and make additions come out of someone’s budget. And the buffer is not wasted inventory: it absorbs duplicate scans, plus-ones that slip through, and counting errors, and anything unused can be released as last-minute tickets once your numbers are confirmed. For seated events, run the same exercise per section — our post on seating chart best practices explains how holds and accessibility seating fit into a chart.
The no-show math: should you ever oversell?
Airlines oversell because they have decades of no-show data and a compensation system for bumped passengers. Most events have neither, so the honest answer for paid events is: almost never.
No-show rates vary enormously by event type. Paid events with meaningful ticket prices typically see 3–10% no-shows. Free registration events routinely see 30–50%. That gap is why the oversell question has two different answers.
| Scenario | Typical no-show rate | Recommended approach |
|---|---|---|
| Paid event, first edition (no history) | Unknown | Never oversell; use a waitlist |
| Paid event, recurring with attendance data | 3–10% | Sell to 100% of sellable capacity; release buffer late |
| Free registration event | 30–50% | Overbook 20–40% based on your own history |
| Free event, high-demand (limited seats) | 15–30% | Overbook modestly; confirm attendance by email |
If you run a free event, overbooking is close to mandatory — otherwise you will host a half-empty room. Start conservative (around 20% over), track your actual show rate with check-in data, and tune the multiplier for the next edition. A confirmation email a few days out (“still coming? tap to confirm or release your seat”) both improves your forecast and frees seats you can reallocate. The tactics in our guide to reducing event no-shows directly increase how close to capacity your room actually fills.
For paid events, the downside is asymmetric. Underselling by 3% costs you a few ticket sales. Overselling by 3% at a full event means paid customers refused at the door, refunds, and public complaints. Keep the buffer, sell to your sellable number, and let a waitlist capture the overflow demand.
Splitting capacity across ticket tiers and releases
Once you know your sellable number, decide how to divide it. Releasing all tickets in one undifferentiated batch wastes both urgency and pricing power. Splitting capacity into tiers and timed releases lets you reward early buyers, test demand, and keep momentum through the whole sales window.
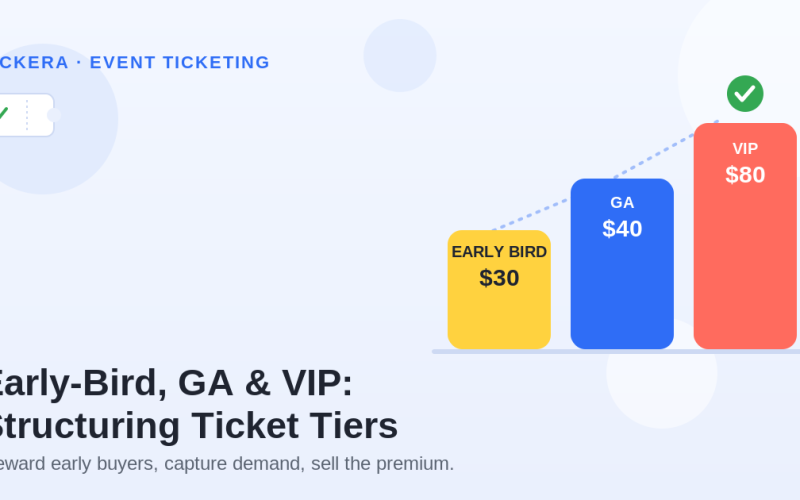
A structure that works for most mid-sized events: put roughly 15–25% of sellable capacity into an early-bird tier, 50–60% into general admission, 10–15% into a premium or VIP tier, and hold back 5–10% as a final release. The final release matters more than it looks — it gives you inventory for a “last tickets” push, absorbs reclaimed holds and comps, and lets you end the campaign selling rather than begging.
Set each tier’s quantity as a hard limit in your ticketing system rather than tracking it in a spreadsheet. When quantities are enforced at the point of sale, “early bird sold out” is a fact your buyers can see, not a claim — and scarcity you can prove converts far better than scarcity you announce. For the pricing logic behind each tier, see our breakdown of structuring early-bird, GA, and VIP ticket tiers.
One caution: tiers share one room. Your ticketing setup must cap the total across all ticket types, not just each type individually, or a strong-selling tier can quietly push your combined total past sellable capacity.
What to do when you sell out
Selling out early feels like a win, but it usually means one of two things: you priced too low, or you have unmeasured demand you can still use. Either way, do not just switch the page to “Sold out” and walk away.
Open a waitlist the moment the last ticket sells. It captures buyer contact details while intent is at its peak, gives you a ranked queue for any returned or released tickets, and hands you hard data — the size of your waitlist is the best single input for choosing next edition’s venue and prices. Reclaim unused holds and comps in the final week and feed them to the waitlist in small batches. We covered the mechanics in detail in how to run an event waitlist that actually converts.
A sold-out event is also where a clear transfer policy earns its keep. Buyers who cannot attend will resell or hand off tickets whether you support it or not; a sanctioned transfer path keeps names accurate for check-in and keeps the resale inside your rules.
Capacity on event day: check-in, re-entry, and live counts
Your capacity plan survives contact with reality only if the door can enforce it. Three things make that possible.
First, a live attendance count. Scanned-ticket counts beat clickers and guesswork; whoever manages the room should be able to see current occupancy at any moment, because “how many people are inside right now?” is the exact question a fire marshal will ask.
Second, a re-entry policy decided in advance. If attendees can leave and return, your occupancy count must decrement on exit — otherwise your numbers say “full” while the room is half empty, or worse, the reverse. If you cannot scan people out, the safer default for near-capacity events is no re-entry, clearly stated at purchase.
Third, duplicate protection. At capacity, every ticket scanned twice is potentially a person inside who should not be. Digital tickets with single-use QR codes solve this cleanly: the second scan is flagged the moment it happens, at whichever entrance it happens. If you are still weighing scanning hardware options, our comparison of barcode scanners versus a check-in app is a good starting point.
How Tickera helps you control capacity in WordPress
Tickera turns your WordPress site into a ticketing system where capacity is enforced, not just recorded. You set a quantity limit per ticket type and a total limit per event, so tiers can never combine past your sellable number. Every ticket carries a unique QR code, and the Checkinera app validates each code once — duplicate scans are rejected instantly, and the live check-in count gives you real occupancy at any moment, even with multiple entrances scanning in parallel.
Holds and comps fit the same workflow: generate free or 100%-discounted tickets for your guest list so that every person in the room, paid or not, is a scannable record against your capacity. Ticket transfers keep names accurate when buyers hand tickets off, and CSV export gives you the attendance data to tune next edition’s oversell buffer or overbooking rate. Because Tickera runs on your own site with no per-ticket fees, splitting capacity into more tiers and releases never costs you anything extra — see Tickera pricing for the current license options.
Capacity planning checklist
- Confirm licensed occupancy in writing for your exact layout, and whether it includes staff and crew.
- Subtract staff, crew, vendors, and security from the venue number.
- Cap comps and guest list early; make late additions come from a named budget.
- Reserve production holds: accessibility seating, photo/tech areas, artist guests.
- Keep a 1–3% buffer; plan a date to release whatever is unused.
- Split sellable capacity across tiers with hard quantity limits and a total event cap.
- Decide the oversell/overbook question with data: never for paid events without history, 20–40% for free events.
- Open a waitlist at sell-out and feed it reclaimed holds in batches.
- Staff the door for your arrival peak, not your average.
- Set a re-entry policy and a live occupancy count before doors open.
Final thoughts
Capacity planning is unglamorous until the day it saves your event. The discipline is simple: treat the venue number as a ceiling rather than a target, derive a sellable number you can defend line by line, enforce it with hard limits in your ticketing system, and give your door team the tools to hold that line in real time. Do that once, keep the check-in data, and every future edition gets easier — your no-show rate, arrival curve, and waitlist size stop being guesses and become inputs.
FAQ
What is event capacity planning?
Event capacity planning is the process of converting a venue’s legal occupancy limit into a sellable ticket count by subtracting staff, comps, production holds, and a safety buffer, then structuring that count across ticket types, sales phases, and a door plan that can enforce it on event day.
How many tickets should I sell for a 500-person venue?
Typically 80–90% of the licensed number. After subtracting staff and crew (roughly 30), comps and guest list (20), production holds (15), and a small buffer (10), a 500-person venue usually yields around 425 publicly sellable tickets. Your exact split depends on the event, but the venue number should never equal the on-sale number.
Is it OK to oversell an event to cover no-shows?
For paid events, generally no — the cost of refusing paid customers at a full door outweighs the revenue from a few extra tickets. Use a waitlist instead. For free events, overbooking 20–40% is standard practice because free registrations commonly see 30–50% no-show rates.
Do staff and crew count toward venue capacity?
Usually yes. Licensed occupancy typically covers every person in the space, including staff, security, vendors, and performers. Confirm with your venue in writing, and subtract those headcounts before setting ticket quantities.
How do I stop selling tickets when capacity is reached?
Set hard quantity limits in your ticketing system — per ticket type and as a total across all types for the event. In Tickera, quantity limits are enforced at checkout automatically, so sales stop the moment the cap is reached without manual monitoring.
How do I track how many people are inside during the event?
Use scanned check-ins as your live count rather than clickers or estimates. A check-in app such as Checkinera validates each QR-coded ticket once and keeps a running total across all entrances, giving you an accurate occupancy figure at any moment.