Quick answer
An event waitlist that actually converts is more than a “we’re sold out” form. It captures interested buyers the moment tickets run out, ranks them fairly, and releases seats in small, time-limited batches so demand turns into paid orders instead of cold leads. Done right, a waitlist recovers revenue from cancellations, validates demand for a bigger room or a second date, and gives you a warm audience for your next event.
- Capture name, email, and desired ticket type so you can release the right seats to the right people.
- Release inventory in small, time-boxed batches with a clear claim deadline to create urgency without chaos.
- Measure conversion at every step so the waitlist informs pricing, capacity, and your next on-sale.
In this guide
- Why most waitlists fail to convert
- What to capture when someone joins
- How to order and prioritize the list
- Releasing seats in batches that convert
- The waitlist email sequence
- Setting up a waitlist on your WordPress site
- How Tickera helps you run a converting waitlist
- Metrics that tell you the waitlist is working
- Common waitlist mistakes to avoid
- Waitlist launch checklist
- FAQ
Why most waitlists fail to convert
A waitlist is one of the highest-intent assets an event organizer can own. Someone tried to buy a ticket, found none, and still raised their hand. That is as warm as demand gets. Yet most waitlists quietly leak that demand because they are treated as a passive holding pen rather than an active sales channel.
The typical failure pattern looks like this: a generic “notify me” box collects emails into a spreadsheet, nobody touches it for weeks, and when seats finally open the organizer blasts everyone at once with a single link. The fastest clickers win, the rest feel ignored, and a big share of the list has already moved on. No urgency, no order, no follow-up — just a list that ages out.
A converting waitlist flips every one of those defaults. It collects enough information to match people to the right tickets, it sets expectations the moment someone joins, and it releases inventory in a controlled way that rewards interest with a real, time-limited chance to buy. The difference between a 5% and a 35% waitlist conversion rate is almost entirely process, not luck.
What to capture when someone joins
The join form is where most of the leverage lives. Ask for too little and you cannot prioritize or personalize the release; ask for too much and people abandon the form. The goal is the minimum set of fields that lets you release the right seat to the right person at the right time.
At a minimum, collect a name and email. Beyond that, the single most valuable field is the ticket type or tier the person wants. If your VIP tier sold out but General Admission is still open, you do not want to send GA-only buyers a VIP release — and you do want to know exactly who is waiting for that scarce VIP seat. Party size is the next most useful field: a person waiting for four seats is a different release decision than someone waiting for one.
| Field | Why it matters | Required? |
|---|---|---|
| Name | Personalize the release email and match the order | Yes |
| Primary release channel | Yes | |
| Desired ticket type | Release the right inventory to the right people | Yes |
| Party size | Decide how many seats one release covers | Recommended |
| Mobile number | Optional SMS nudge for time-sensitive releases | Optional |
| Marketing consent | Lets you keep the lead for future events | Recommended |
Always include a clear consent checkbox so you can keep contacting people who do not convert this time — a non-converting waitlister is still a great prospect for your next event. If you operate in the EU or sell to EU attendees, treat that consent as a hard requirement, not a nicety.
How to order and prioritize the list
Once people start joining, you need a fair, defensible rule for who gets the next available seat. The order you choose shapes both conversion and goodwill, so decide it before you open the list rather than improvising under pressure.
First-come, first-served by join timestamp is the simplest and most widely understood approach. It feels fair because it rewards the people who showed up first, and it is trivial to administer: sort by the time someone joined and work down the list. For most events, this is the right default.
A waitlist is not a lottery you run once. It is a queue you work in small batches, measuring conversion at each step and adjusting the pace as seats come back.
There are good reasons to layer a second sort on top of timestamp. You might prioritize buyers of a higher tier, returning attendees from a past event, or people requesting a single seat when you only have singles left. Whatever you choose, write the rule down and apply it consistently. The fastest way to damage trust is to look like you are jumping people in the queue without explanation.
Releasing seats in batches that convert
The release mechanic is where waitlists win or lose. Releasing every available seat to the entire list at once recreates the original scramble and trains people to ignore your emails. Releasing in small, time-boxed batches does the opposite: it gives each person a genuine, personal window to act.
The core pattern is a claim link with a deadline. When seats open, notify the top slice of the list — say the next ten people for ten available seats — and give each a unique window, commonly 12 to 48 hours, to complete checkout. If they do not claim in time, the seat rolls to the next person automatically. This produces urgency that is real rather than manufactured, because the deadline genuinely determines whether they get in.
| Release style | How it works | Best for |
|---|---|---|
| Single mass release | Everyone gets the link at once | Tiny lists or low-stakes free events |
| Rolling batches | Top N notified, deadline, then roll to next N | Most paid events — the default |
| Tier-matched release | Only people waiting for that tier are notified | Events with VIP/GA scarcity differences |
| Timed windows | Each person gets a personal claim deadline | High-demand events where fairness matters |
Match your batch size to how many seats you actually have and how fast you expect people to act. If your list converts at roughly one in three, releasing ten seats to thirty people is a reasonable first batch — but watch the live count and slow down before you oversell. The same discipline you apply to a fast door check-in flow applies here: control the flow so the system never gets ahead of real capacity. For more on managing high-demand moments, see our guide on event check-in strategy.
The waitlist email sequence
Every waitlist needs at least three emails, each doing a specific job. Vague, infrequent communication is what kills conversion, so script these before you open the list.
The first is the confirmation, sent the instant someone joins. It should thank them, set expectations about how and when seats are released, and reassure them that their place is recorded. This single email dramatically reduces the “did it work?” anxiety that causes people to join twice or give up.
The second is the release email — the one that actually offers a seat. It must be unmistakable in the inbox, lead with the deadline, and contain one obvious call to action. State plainly: a seat is available, you have until a specific time, here is the link, and the seat rolls to the next person if you miss it. Resist the urge to bury the link under paragraphs of context.
The third is the gentle nudge, sent a few hours before the claim window closes to people who opened but did not buy. A short reminder recovers a meaningful slice of almost-buyers. If you collected mobile numbers with consent, a single SMS at this stage often outperforms another email. The same principles that reduce event no-shows — clear timing, one action, friendly tone — apply directly to waitlist conversion.
Setting up a waitlist on your WordPress site
Running the waitlist on your own WordPress site keeps you in control of the data, the branding, and the buyer relationship — instead of handing all of it to a third-party marketplace. The setup has three moving parts: a capture form, a way to detect sold-out inventory, and a release process tied to your checkout.
The capture form can live right on the event page, appearing automatically once a ticket type sells out. When inventory frees up — from a cancellation, an expired hold, or added capacity — you release it through your normal ticket checkout so the buyer completes a real, paid order with a real ticket at the end. The key is that the waitlist and the checkout are the same system, so a claimed seat becomes a confirmed, scannable ticket without manual re-entry.
Because everything runs on your domain, the waitlist also feeds your wider funnel. The same attendees power your remarketing, your next on-sale announcement, and your event landing page social proof. A self-hosted setup means the list is yours to keep, not rented from a platform that may change its rules or fees.
How Tickera helps you run a converting waitlist
Tickera is a self-hosted WordPress ticketing system, which means the waitlist, the checkout, and the attendee data all live on your own site under your own brand. When a waitlisted buyer claims a released seat, they go through Tickera’s standard checkout and receive a real digital QR-code ticket — the same ticket your door staff scan with the check-in app on event day. There is no separate tool to reconcile and no marketplace taking a cut of recovered sales.
Because Tickera tracks inventory per ticket type, you can match releases to exactly the tier people are waiting for, export your full waitlist and buyer data to CSV for analysis, and carry the same audience into your next event. Cancellations and transfers free up seats cleanly, so the inventory you release to the waitlist is always real. You can explore the full feature set at tickera.com and compare options on the pricing page.
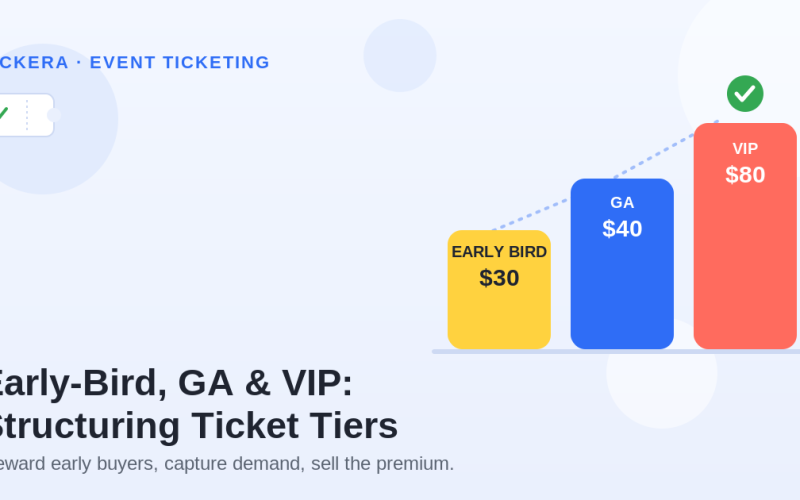
The practical payoff: a waitlist stops being a dead-end form and becomes a measurable channel that recovers revenue you would otherwise lose to cancellations and sell-outs. Pair it with a smart ticket pricing strategy and you have a system that captures demand at every price point.
Metrics that tell you the waitlist is working
If you cannot measure it, you cannot improve it. A converting waitlist is instrumented at every step so you know where people drop off and what to fix before the next on-sale.
Track join rate (how many sold-out-page visitors actually sign up), release open rate, claim rate (offered seats that get purchased), and time-to-claim. Together these tell you whether your form is too long, your release email is unclear, or your claim window is too short. A healthy paid-event waitlist often converts 25% to 40% of offered seats; if you are far below that, the release email and deadline are the first things to examine.
| Metric | What it reveals | If it is low, fix |
|---|---|---|
| Join rate | Whether your form and offer are compelling | Shorten the form, clarify the value |
| Release open rate | Subject line and sender trust | Subject line, sender name, timing |
| Claim rate | Whether the offer converts to a sale | Deadline clarity, single CTA, price |
| Time-to-claim | Whether urgency is landing | Tighten the window, add a nudge |
Demand data from the waitlist is also a planning gift. A long, fast-converting list is hard evidence that you can justify a bigger room, a second date, or a higher price tier next time. That is one reason to treat the list as a strategic asset and not just an overflow valve.
Common waitlist mistakes to avoid
Most waitlist disappointment traces back to a handful of avoidable errors. Knowing them in advance is the cheapest improvement you can make.
The first is silence after sign-up. If people hear nothing for weeks, they forget they joined and ignore the eventual release. Send the confirmation immediately and, for long lead times, a short “still on the list” check-in. The second is the all-at-once blast, which recreates the original scramble and rewards only the fastest clicker. The third is no deadline: an open-ended “seats available” link removes the urgency that drives conversion. The fourth is mismatched inventory — offering GA seats to people who specifically wanted VIP, which reads as careless and wastes a release. The fifth is forgetting consent, which leaves you legally exposed and unable to reuse a hard-won audience.
None of these require fancy tooling to fix. They require a written process: capture the right fields, confirm immediately, release in batches with deadlines, match inventory to demand, and keep consent clean.
Waitlist launch checklist
- Capture form is live and appears automatically when a ticket type sells out.
- Form collects name, email, desired ticket type, party size, and marketing consent.
- Confirmation email fires instantly and sets clear expectations.
- Prioritization rule (timestamp, tier, or returning attendee) is written down and consistent.
- Release batches are sized to real inventory, with a 12–48 hour claim deadline.
- Release email leads with the deadline and has one obvious call to action.
- A nudge email or SMS is scheduled before each claim window closes.
- Claimed seats flow through real checkout and produce a valid, scannable ticket.
- Join rate, claim rate, and time-to-claim are tracked from day one.
- Non-converting waitlisters are tagged for your next event announcement.
Final thoughts
A waitlist is the only marketing list where every single person has already tried to give you money. Treating it as an afterthought wastes the warmest demand you will ever have. Treating it as a real sales channel — with the right capture fields, a fair release order, time-boxed batches, and a tight email sequence — turns sell-outs and cancellations into recovered revenue and a head start on your next event. The tooling matters less than the discipline: confirm fast, release in batches, set deadlines, and measure everything. Build that process once and every future on-sale benefits from it. For more on filling the room from the start, see our guide on how to sell more event tickets.
FAQ
What is an event waitlist and when should I use one?
An event waitlist captures interested buyers after a ticket type sells out so you can offer them seats that free up later from cancellations or added capacity. Use one whenever demand may exceed supply — popular tiers, limited venues, or any event where you would otherwise turn buyers away with no way to follow up.
How many seats should I release in each batch?
Match the batch to your real available inventory and expected conversion. If roughly one in three offered seats gets claimed, releasing ten seats to about thirty people is a sensible first batch. Always watch the live count and slow down before you risk overselling.
How long should the claim window be?
Between 12 and 48 hours works for most paid events. It is long enough to reach people across time zones and work schedules, but short enough to create genuine urgency. Send a reminder a few hours before the window closes to recover almost-buyers.
Should I prioritize the waitlist by sign-up time or by ticket tier?
First-come, first-served by sign-up time is the simplest and most widely accepted default. Layer a tier or returning-attendee priority on top only if it serves your event, and always write the rule down and apply it consistently so the queue feels fair.
Can I run a waitlist on my own WordPress site?
Yes. With a self-hosted ticketing system like Tickera, the capture form, checkout, and attendee data all live on your domain. Released seats flow through your normal checkout and become real scannable tickets, and you keep the full list for future events instead of renting it from a marketplace.
What conversion rate should I expect from a waitlist?
A well-run paid-event waitlist commonly converts 25% to 40% of offered seats into purchases. If you are far below that, look first at your release email clarity, the strength of your deadline, and whether you are offering the ticket type people actually requested.