Quick answer
This walkthrough shows how to set up a real multi-day conference in Tickera: single-day and both-day tickets, different prices for adults, children, and seniors, a limited early-bird batch, custom forms for t-shirt sizes and meal preferences, and a post-event revenue report. Follow it as a template and adapt the numbers to your own event.
- Use ticket types for single-day, multi-day, and early-bird options.
- Use custom forms to collect t-shirt size and dietary choices at checkout.
- Test the whole flow and pull a revenue report after the event.
Before you build the event, it helps to have your pricing and launch plan in order. See our guides on event ticket pricing strategy and what to do before you start selling tickets, then use the scenario below as your build template.
Scenario
You are hosting a two days conference and want to offer tickets for single days and a ticket valid for both days of the conference. Tickets should be available with different price for adults, children, seniors. Also, you want to offer a limited batch of Early Bird tickets for both days with special discount and these tickets should be available only for the first two days upon starting ticket sales. In addition to the tickets, you want to give complimentary T-shirts at the door and to include a lunch so each attendee should be able to select a T-shirt size and dietary preference for their lunch. After the event, you would like a report on total revenue of the ticket sales for the conference.Requirements
For this scenario, we will be using following plugins and add-ons:- Tickera (core plugin)
- WooCommerce
- Bridge for WooCommerce add-on
- Custom Forms add-on
- Barcode Reader add-on
- CSV Export add-on.
Getting hands dirty
When you have installed and activated all these plugins, first and foremost head to Tickera -> Events and create an event. Thorough description of all the options available when creating an event can be found here but vast majority of these options are completely optional so you only really need to enter a title of your event and set its start and end date and time and that’s about it.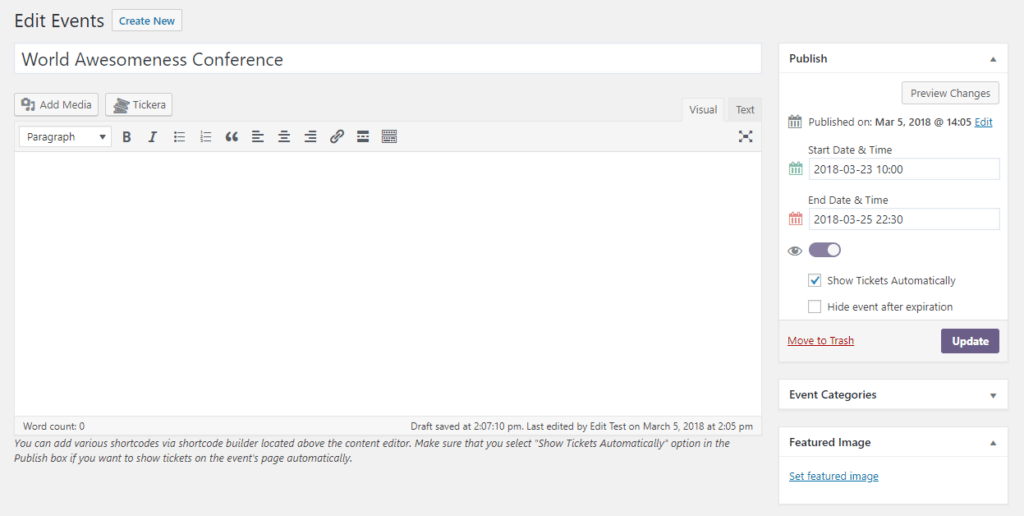
All the ticket types
Early Bird Now, head to Products area of WooCommerce where we’ll be creating ticket types as WooCommerce products. First, we’ll create an Early Bird ticket as simple WooCommerce product (since this ticket type is already well discounted so no additional discount should be applied). Thorough instruction on how to create ticket type as WooCommerce product can be found here. Apart from setting a desired price for this ticket type, there are two other important things that will make this ticket act according to aforementioned scenario: Available dates for ticket selling and Available dates and times for ticket check-in. By setting available dates for ticket selling you will be defining for how long this ticket type will be available for purchase while Available dates and times for ticket check-in will make it valid for both days if you match the start and end date and time with the start and end date and time of your event. Standard tickets with variations After you have created this ticket type, you may proceed to creating Standard ticket type for the first day of the conference. This time, we’ll create a ticket type as variable WooCommerce product. Thorough instruction on this can be found here (scroll to about the middle of the page). Now, use variations to represent different options for this ticket type (Adults, Children, Seniors, etc.) and set different prices for each of the variations. Again, when done setting up variations and prices, you should set up available dates for ticket selling but in such way that its start date should match the end date of the ticket selling availability of the Early Bird ticket. That way, once Early Bird ticket selling end date expires, Standard tickets will appear the same moment without you having to do anything. Pretty neat, right? Also, set available date/time for check-in to match the date of the first day of your conference.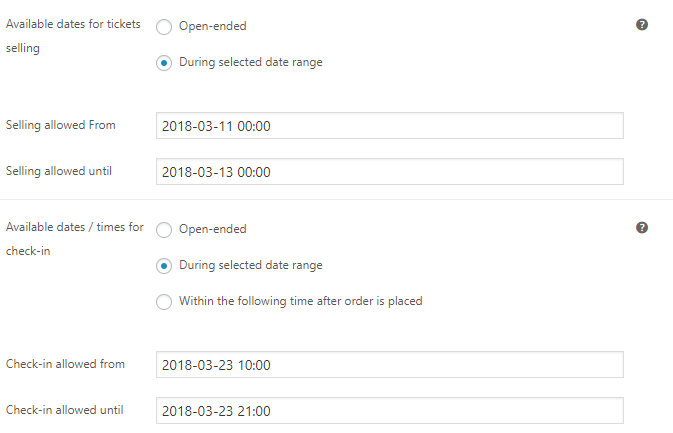 The process of creating Standard ticket type for the second day of the conference is exactly the same as for the first with the only difference being the date/time for the check-in availability which should, in this case, match the date of the second day of the conference.
Same goes for the ticket for both days. The only difference would be the price (obviously) and check-in availability date and time which, in this case, should be set to to match start and end date and time of the whole event (two days).
The process of creating Standard ticket type for the second day of the conference is exactly the same as for the first with the only difference being the date/time for the check-in availability which should, in this case, match the date of the second day of the conference.
Same goes for the ticket for both days. The only difference would be the price (obviously) and check-in availability date and time which, in this case, should be set to to match start and end date and time of the whole event (two days).
Event perks
So, we have now created ticket types and set everything according to scenario and it’s time to take care of the bonus stuff; T-shirts and dietary preferences for lunch. For this, we’ll be using Custom Forms add-on. With this add-on, we’ll be able to collect any additional information about our attendees which, of course, includes their T-shirt size and dietary preference. So, head to Custom Forms area of Tickera and create new attendee form. Once the form builder loads, place a dropdown or radio button element (depending on how you want to offer your customers to select their option) to the form and enter all the options you want to offer. Thorough instruction on creating custom forms can be found in our documentation here. For this particular scenario, once you have placed an element of your choice for T-shirt size and dietary preference, you should also check Allow field export and Create ticket template element. This means that you will be able to export this data later, and to place this information directly on the ticket. Of course, you can also check Show on the admin order detail page and Show in Check-in app options which will result in showing this information in those two places.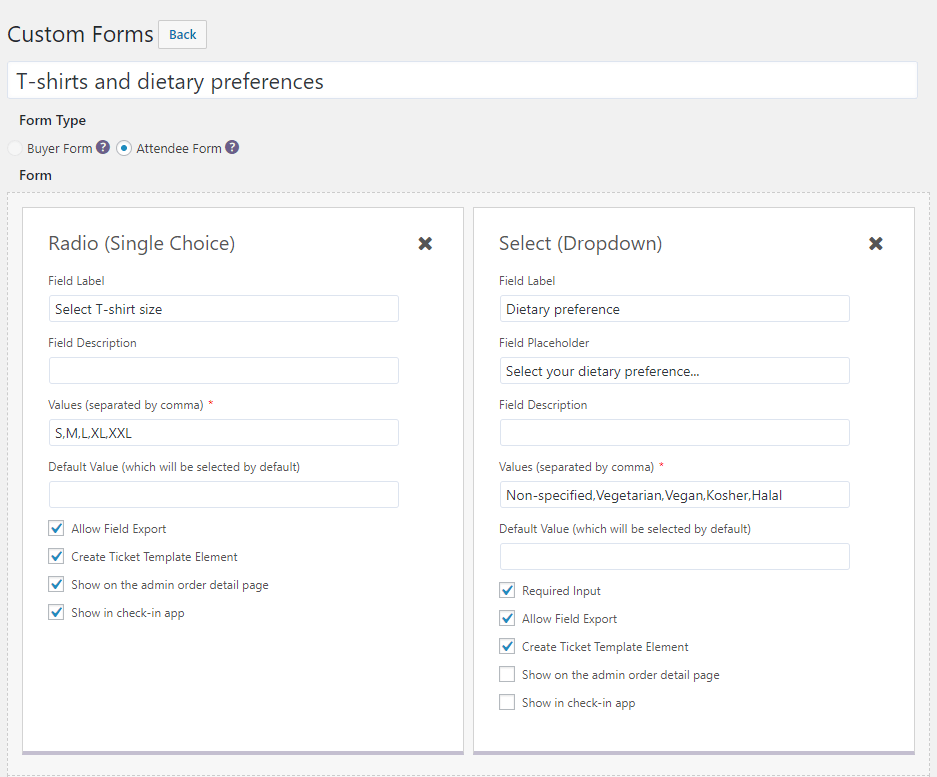 Okay. So, you have created a custom form but in order for it to actually appear on the checkout page, you will have to associate it with some ticket types. In your case, if all the attendees are eligible for receiving a T-shirt and lunch, you should associate this custom form with all the ticket types you have. To do this, edit ticket types one by one an within Attendee Form dropdown menu select a custom form you have just created. This will result in selection for the T-shirt and dietary preference to appear for each attendee on the checkout. Of course, you can create multiple custom forms if you want and associate different custom form to different ticket types if you need some other specific information to collect which is related to that exact ticket type.
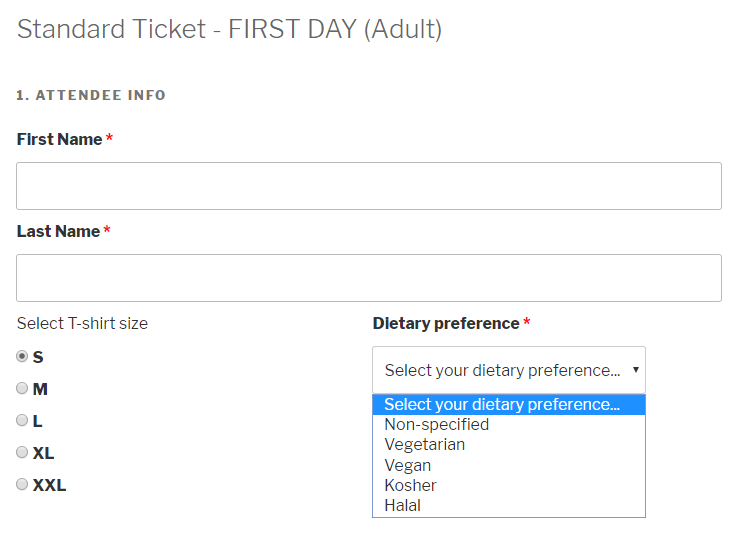
Ticket template
We have mentioned previously that you can display T-shirt size and dietary preferences on the ticket itself. But what makes ticket, well, a ticket, is QR code and/or barcode. One or both of these elements are crucial part of the ticket and although you can remove both from the ticket we strongly recommend you not to if you would like to be able to check the tickets in (which we believe you do). Apart from this, you can also place any other information to the ticket itself in any way you see fit. Thorough instruction on using our ticket template builder can be found here So, we recommend placing these elements to the ticket template:- Event Name – so that your attendees know what they are visiting 😀
- Ticket Type – this element will also contain a variation that attendee selected when purchasing their ticket (i.e. Adults, Children, Seniors, etc.).
- QR and/or barcode – if you are unsure about which you should use, please read our post here
- T-shirt size and dietary preference
- Google Map – this will display a neat map so that attendees can find your venue easier
One thing you should really pay attention to is not to clutter the ticket with unnecessary information. Also, and we can’t emphasize this enough, please make sure to set up QR and/or barcode size sufficient enough so it can be recognized and scanned.We have been writing about this extensively here and we strongly recommend you to read this post as it may make the difference between make or break for your event. And please, PLEASE, read that BEFORE you start selling tickets as tickets, once sold and delivered to the customers, can’t be changed without re-sending the tickets one by one (which is pretty pain in the back job if you have already sold hundreds of tickets, let alone that it confuses attendees and looks really unprofessional).
Selling the tickets
To be able to actually sell anything on your website, you will have to set up payment methods. Now, since this scenario uses WooCommerce for ticket selling, if you have already used WooCommerce before to sell some other stuff, chances are that you already have everything set up so you’re good to go. If, however, you’re starting fresh, you will need a merchant account with some of WooCommerce supported payment gateways. There are hundreds of available payment gateways for WooCommerce; some can be found on their website here while some can be found all over the web, including WordPress plugin repository here.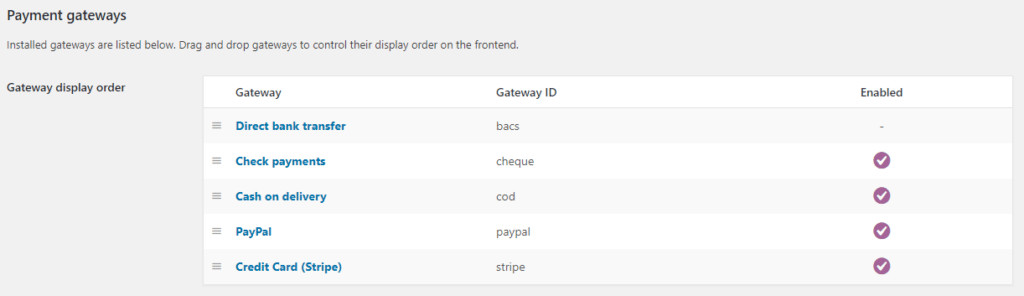 Now, if you want to sell tickets “manually” please note that Tickera is not intended to be used like that as it is, after all, an online event ticketing system. BUT! if it is a must for you, you can utilize a solution which includes WooCommerce POS plugin and which is thoroughly explained here.

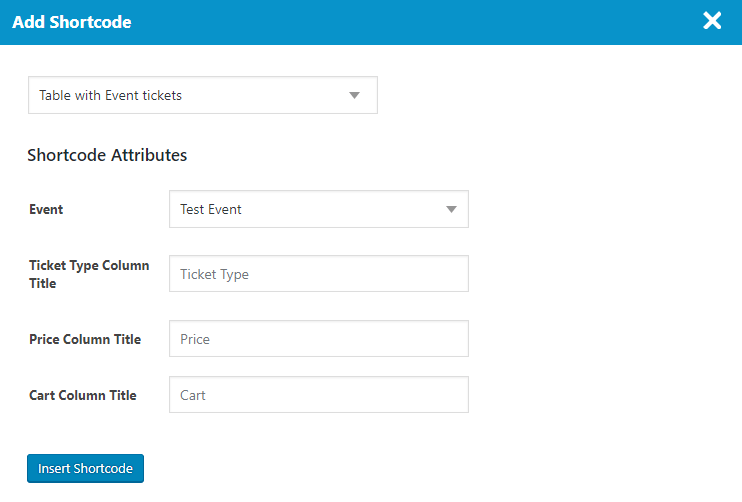
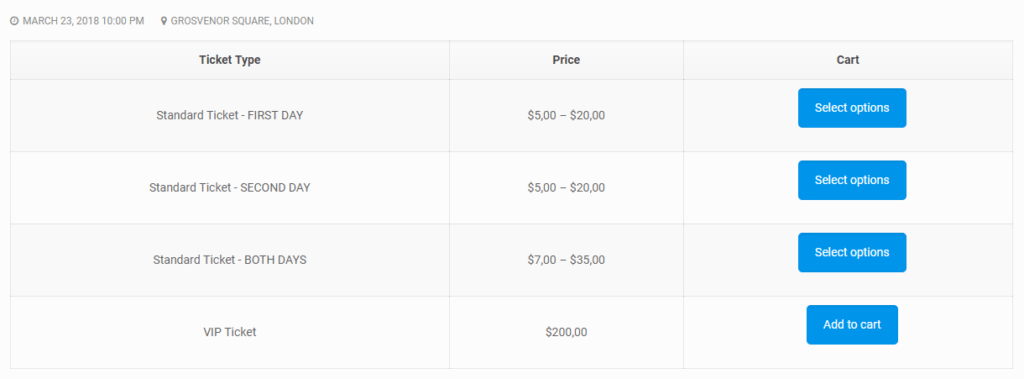
Bear in mind one thing though: making an order manually from WooCommerce back end, won’t result in creating tickets in Tickera!As for the selling tickets on the front end of your website, there are many options you can use. One of the easiest is to use your event page for this. When creating new or editing existing event, you will notice that there is an option named Show Tickets Automatically. When this option is checked, all the ticket types associated to this event will be automatically displayed on the event page. Another option is to display available tickets on any of your pages or posts by utilizing Tickera shortcode builder. To do this, when creating new or editing existing page or post, click the big button atop the content area named Tickera and a shortcode builder will appear. Within this shortcode builder, you can select many things but to display the table with available tickets, you should select an option Table with Event tickets. Then, select an event you wish to display tickets for and, if needed, change column titles.
 Also, since you’re using WooCommerce, you can use its own shop page to sell the tickets since, after all, you have created ticket types as WooCommerce products. However, if you are selling other stuff on your website apart from the tickets and want to use this shop page only for goodies but not for the tickets, you can head to Tickera Settings -> General tab -> WooCommerce area and set Hide Tickets to Yes. This will cause all the products declared as tickets to disappear from the shop page.
At the day of the event
So, ticket sales went live and you’ve sold out your event. Good job! Now, the time of the event has come, and you’re shifting your focus from ticket selling to the check-in process. Now, if you have sold large number of tickets, we strongly suggest you to use any standard barcode or 2D scanner connected to the computer that is running our Check-in Chrome Desktop app.Free tool — Check-in Queue Planner: Registration-desk queues set the tone for a whole conference. Venuera’s free Check-in Queue Planner simulates your door minute by minute and tells you how many scan lanes to run, your peak queue wait, and how many guests are still outside at showtime — it runs in your browser with no sign-up. Plan your door →
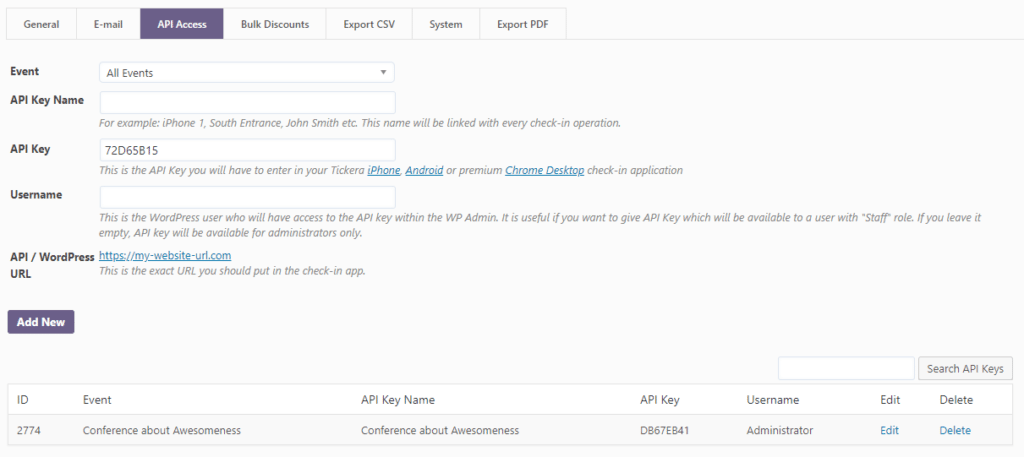
Scanning tickets with barcode/2D scanners is much faster and not at all affected by low light conditions which is not the case with the cameras on the smartphone devices.Now, to be able to use any of the Check-in apps, you will need two things: your website URL and API key of your event. Both of these can be found in Tickera Settings -> API Access tab. Simply enter this information to the Check-in app and hit Sign in button.
 Once logged in, you will be taken to the default Home/Stats screen which displays two numbers; number of tickets sold and number of checked-in tickets. If you’re using Check-in Chrome Desktop app, when you log in to it, few moments later, a notification should appear informing you that the attendees and tickets data has been successfully downloaded. At this point, you may disconnect the computer from the internet and check the tickets in offline. Please note that offline check-in is possible only for the Check-in Chrome Desktop app while Check-in apps for iOS and Android require constant internet connection.
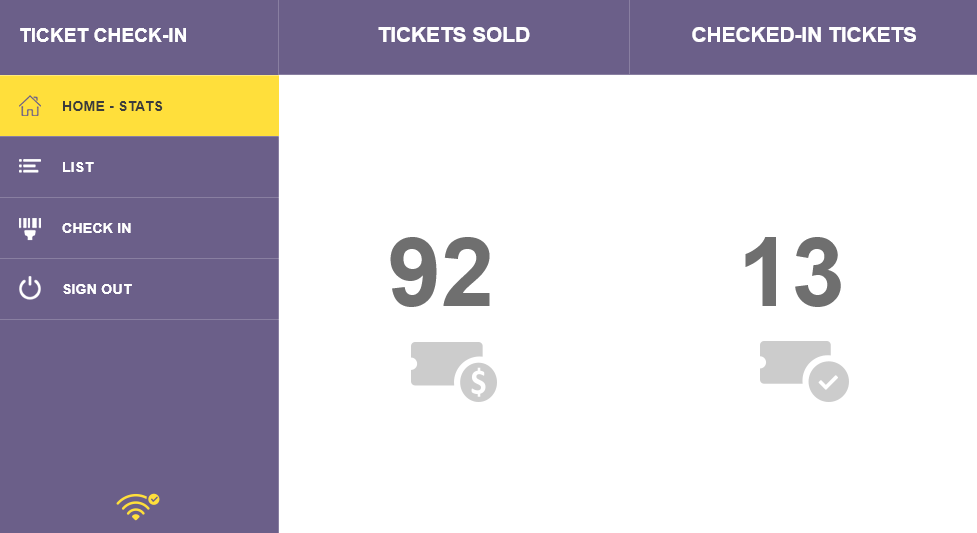 If, however, you have multiple entrances and using multiple instances of the Check-in app (which, by the way you can – there are no limitations), it is advisable to run Check-in Chrome Desktop app while connected to the internet as this will make it possible for each of the instances of the Check-in app to communicate with the attendee database on your website and prevent checking-in with the same ticket on multiple entrances.
So, attendees are here and ticket check-ins are going smooth… all of a sudden, upon ticket check-in, Check-in app threw a response that the ticket code is not valid. Upon inspection of a ticket, you have realized that the attendee has a ticket for different day of the conference and since you have set check-in availability date/time for that ticket type to match the exact date and time which is obviously, different than today’s date, Check-in app will not allow this ticket to be checked-in until tomorrow or any date you have set up for that ticket type. Whether you will let this attendee in or not, however, is entirely up to you 🙂
Now, to be able to easily spot the tickets which do not belong to certain day, there are few options:
If, however, you have multiple entrances and using multiple instances of the Check-in app (which, by the way you can – there are no limitations), it is advisable to run Check-in Chrome Desktop app while connected to the internet as this will make it possible for each of the instances of the Check-in app to communicate with the attendee database on your website and prevent checking-in with the same ticket on multiple entrances.
So, attendees are here and ticket check-ins are going smooth… all of a sudden, upon ticket check-in, Check-in app threw a response that the ticket code is not valid. Upon inspection of a ticket, you have realized that the attendee has a ticket for different day of the conference and since you have set check-in availability date/time for that ticket type to match the exact date and time which is obviously, different than today’s date, Check-in app will not allow this ticket to be checked-in until tomorrow or any date you have set up for that ticket type. Whether you will let this attendee in or not, however, is entirely up to you 🙂
Now, to be able to easily spot the tickets which do not belong to certain day, there are few options:
- Name the ticket type suggestively and differently for each day and place the ticket type element to the ticket template
- Create different ticket templates for different ticket types that represent different days of the event
After the event
Everything went well, and your event was a huge success. But you would like to know now what the numbers are saying. By utilizing our CSV Export add-on, you can generate and export per-event attendee lists and include any information you want about each attendee on that list. And since the exported file is in .csv file format, it is convenient for further data wrangling in software such as Microsoft Office Excel, OpenOffice Calc, Apple Numbers, Google Sheets or any other that supports .csv file format.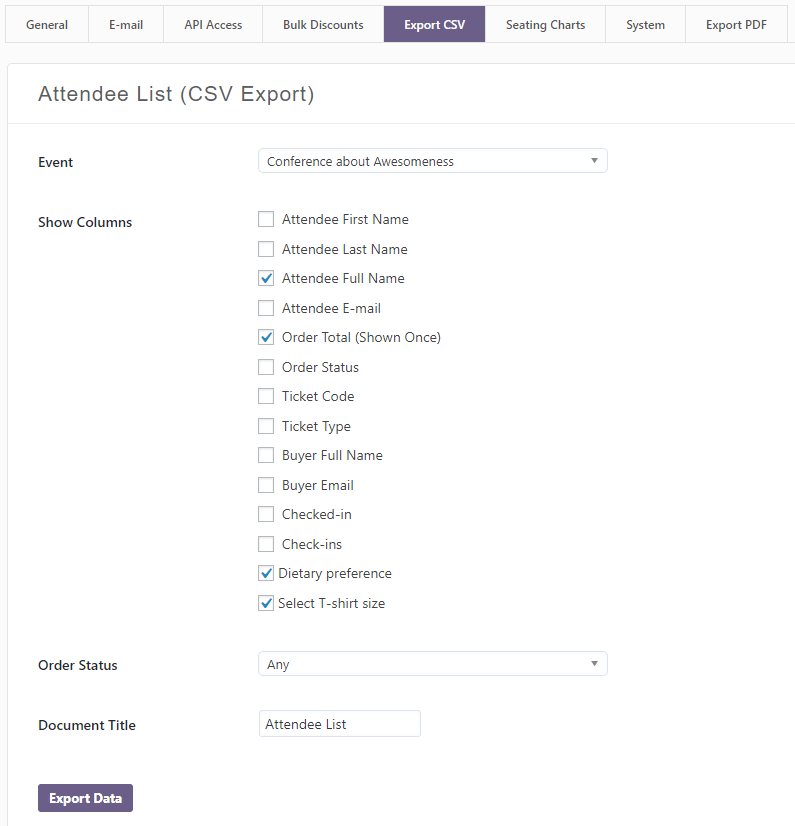 For example, to get the total revenue of the event, you should export a list with Order Total (Shown Once) checked (other fields are optional). This will create a list with all the order totals for the tickets purchased for your event and with the simple SUM function you can get total revenue for the event in few simple clicks.
Conclusion
Scenario explained here is one of the most common scenarios that our customers have when hosting a conference. Of course, based on the requirements and details of your particular scenario, you might want to change a thing or two or even the whole approach but even then, the basic principles will stay the same. Therefore, we believe this guide might be useful to you if you’re hosting anything even remotely similar with conference. Surely, Tickera offers a lot more options than this and the same scenario can be achieved in numerous different ways. So, if you have used Tickera for your conference but applied different approach, please share it with us and we will gladly publish it here.FAQ
How do I sell single-day and multi-day conference tickets in Tickera?
Create a separate ticket type for each option, one per day plus a combined multi-day ticket, and set the price, quantity, and sale dates for each. Buyers then choose the option that fits their plans at checkout.
Can I offer different ticket prices for adults, children, and seniors?
Yes. Create a ticket type for each audience (adult, child, senior) with its own price within the same event, so attendees select the rate that applies to them.
How do I set up early-bird tickets that expire?
Create an early-bird ticket type with a limited quantity and a sale end date. Once the batch sells out or the date passes, the early-bird option closes automatically and buyers move to the standard tickets.
How do I collect t-shirt sizes or meal preferences with a ticket?
Use Tickera’s custom forms to add fields such as t-shirt size or dietary preference to the checkout, so each attendee’s choices are captured with their order and available in your reports.