Mid-sale seating chart switcheroo? We got you!
It’s every event organizer’s favorite moment: everything’s live, tickets are selling, and then — surprise! Your client, boss, or the venue calls and says, “Actually, we’ve decided to assign seats after all.”
Cue the record scratch.
If you’re using Tickera and already started selling general admission tickets, this might sound like a nightmare. But here’s the good news: mid-sale seating chart switch is absolutely doable — with a bit of planning, clear communication, and the magic of the Seating Charts add-on.
In this post, we will talk about how to make that transition without cancelling sales, refunding everyone, or developing a stress-induced twitch.
First, let’s clear up a hard truth
Before we get too deep into the how, here’s a very important thing to understand:
Tickets sold before you enabled the Seating Charts add-on cannot be assigned to specific seats — ever.
That’s not a bug, that’s how the system works. Seat assignment is only possible if a ticket is purchased through the Seating Charts interface. This means any tickets already sold before the switch are considered unassigned and will remain that way.
So the real question becomes: how do you make assigned seating work for everyone else — without abandoning the people who already bought tickets?
Let’s break it down.
Step one: Pause and assess
Before touching the seating chart, take a breath and check the numbers.
- How many tickets have already been sold (without seat assignments)?
- What’s the total capacity of your venue?
- Is there room to dedicate a specific area to those existing, unassigned ticket holders?
These numbers will shape your plan — especially when you move to block off seats or restructure the layout.
It’s tempting to rush into redesigning the seating chart, but this first step is what separates a graceful switch from a disaster with folding chairs.
Option one: Create a seating group for the “free-seating crowd”
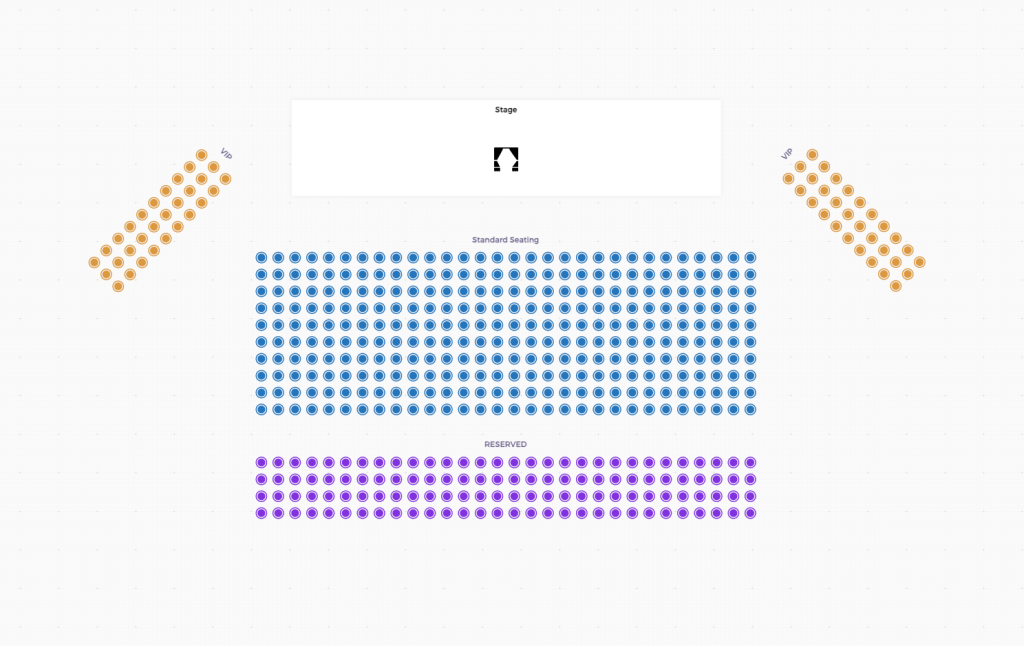
One of the most straightforward strategies is to create a new seating group on your chart, specifically for attendees who already purchased tickets before the switch.
Let’s say you’ve sold 48 tickets already. You can create a group called something like “Unassigned Seating Area” and place 48 seats in that group. This doesn’t give those attendees individually assigned seats — but it ensures there’s space for them at the event, and it gives your on-site team a simple message to communicate: “You’re free to choose any seat in this section.”
It’s clean. It’s honest. It respects the tickets people already bought. And it prevents seat squabbles later.
Just make sure:
- You don’t associate that group with the seating-enabled ticket type (more on that in a minute)
- You inform your attendees where they’ll be sitting (and where they won’t)
And yes, this strategy absolutely works for theater layouts, banquet-style seating, and even festival zones.

Option two: Block off specific seats from existing groups
Already designed your chart and don’t want to add a new section? No problem.
You can go through your existing seating groups and manually select the number of seats matching the unassigned tickets sold, then mark them as unavailable.
Tickera’s Seating Charts editor lets you select seats and toggle their availability with just a few clicks. This way, you’re not reserving those seats for specific people — you’re just ensuring that no one else can buy them.
On event day, those seats become a designated free-seating area. You’ll want to brief your check-in team to direct anyone with a general admission (non-seat-assigned) ticket to these seats.
You can even print out a little sign:
“Section A: General Admission Seating — First Come, First Served”
Communicate like a champ
Good communication is always the key. So, whether you choose to create a new seating group or block off seats in existing ones, your next task is crucial: tell your attendees what’s going on.
Send out a message to anyone who’s already purchased a ticket, letting them know:
- Assigned seating has now been enabled
- Their ticket does not include a seat assignment (but they’re guaranteed a seat!)
- They’ll be directed to a specific section upon arrival
This helps reduce surprises at the door. No one wants to be the person standing in the aisle asking, “Why don’t I have a seat number?”
This becomes even easier if you’ve been using Tickera’s integration with services like Mailchimp, Sendloop, or Customer.io from the start. In that case, you can quickly create an email campaign and communicate directly with your existing attendees.But even if you haven’t set up any of these integrations, you can still accomplish the same thing. Just use Tickera’s CSV Export add-on to export your attendee list — making sure email addresses are included — and then import that list into the email marketing platform of your choice.
Also, update your event page and ticket descriptions to reflect the change. It’s not just about clarity — it builds trust.
Create a new ticket type with seating enabled
Now that you’ve created your plan for unassigned tickets, it’s time to get back to selling — this time, with seating.
To do this, simply create a new ticket type and connect it to your seating chart. From this point forward, customers purchasing tickets will be purchasing their tickets from within the Seating Charts, by selecting their desired seats.
Each of those tickets will be linked directly to a chosen seat, and Tickera will handle the rest. Once a seat is taken, it’s off the map. You don’t have to worry about double bookings or weird overlaps.
Important: don’t try to “attach” existing general admission tickets to this system. It won’t work, and you’ll confuse your check-in process fast.
Instead, let the two ticket types live side-by-side — general admission (already sold) and new assigned-seating tickets going forward.
Prepare your check-in team for a split system
You now have two categories of attendees:
- People with seat assignments (tickets bought through Seating Charts)
- People without seat assignments (tickets bought before the switch)
Your check-in crew needs to know the difference.

Equip them with a simple script:
- Assigned tickets: “Your seat is printed on your ticket. Head to Section B, Row 3, Seat 12.”
- Unassigned tickets: “You’re in the general seating area over here. Feel free to choose any available seat in that section.”
If you’ve enabled the option in Checkinera to redirect to the attendee info screen, that’ll help too — it shows at a glance whether the scanned ticket includes a seat assignment.
You can find how to enable that right here.
Pro tips to keep things smooth
Use signage at the venue. If you’ve created a general seating area, make it visually obvious. A sign with “Open Seating – Ticket Holders Only” can work wonders.
Color-code your tickets. If you’re generating PDFs through Tickera, you can tweak templates so assigned seating tickets look slightly different from general ones. It’s a small thing that makes a big difference for your check-in staff.
Bring backup chairs. We know, we know. But even if you’ve done everything right, someone might bring an unregistered guest. Having a few extra seats off to the side can save you from an awkward conversation.
Wrapping up
Switching to assigned seating mid-sale isn’t ideal — but it’s not the disaster you might think. With the right prep and a little help from Tickera’s Seating Charts add-on, you can make the switch cleanly, clearly, and confidently.
Just remember:
- Tickets already sold without seating can’t be retrofitted with seats
- You can accommodate those attendees with a dedicated section or blocked-off seats
- Communicate clearly, update your listings, and brief your staff
- Going forward, new ticket sales can fully use assigned seating
By the time event day rolls around, everyone will know where to go — and you’ll look like a hero who turned a logistical curveball into a smooth experience.