Quick answer: to sell tickets for an online or streamed event, use Tickera to handle the ticket sale, create a protected access page for buyers, connect that page to your streaming tool, and send clear ticket emails with the link, timezone, schedule, and support instructions.
Online events are no longer a backup plan. Workshops, training sessions, webinars, conferences, product demos, private classes, and hybrid events all need a reliable way to sell access. The challenge is that the “venue” is now a link, and a link can be lost, shared, blocked, or misunderstood if the workflow is not planned carefully.
The original version of this setup used Zoom and a content restriction plugin. The tools may change, but the structure is still the same: sell the ticket, protect the access, communicate clearly, and test the complete attendee journey before event day.
Quick Takeaways
- Do not publish paid stream links openly on the event page.
- Create a protected access page for ticket buyers.
- Make ticket names clear: live access, replay access, VIP, workshop, or bundle.
- Include timezone, access time, support contact, and replay policy in emails.
- Send reminders before the event, not only the original ticket email.
- Test the buyer journey from purchase to stream access.
Start With the Online Event Experience
Before creating tickets, define what the attendee is actually buying. Is it a live-only session? A replay? A workshop with downloadable materials? A Zoom meeting with Q&A? A webinar where attendees can watch but not speak? These details affect ticket pricing, page copy, emails, and support expectations.
For online events, uncertainty kills conversions. If buyers are not sure whether they will receive a replay, whether the time is in their timezone, or whether they can join from a phone, they may delay the purchase. Your event page should answer those questions before the ticket section.

Create Ticket Types That Match Access Levels
Online events often need more precise ticket names than physical events. “General Admission” may not be clear enough. Better options include “Live Online Access”, “Live + Replay Access”, “Workshop Seat”, “VIP Q&A Access”, or “Team Pass”. The ticket name should tell the buyer what they will receive.
| Ticket type | Best for | Important detail to explain |
|---|---|---|
| Live access | Webinars, classes, talks | Start time, timezone, joining link |
| Live + replay | International audiences | Replay availability and expiration |
| VIP access | Workshops or coaching | Q&A, bonus room, limited seats |
| Team pass | Companies or groups | How many people can attend |
Protect the Stream Access Page
The biggest mistake is placing the stream link in public page copy. If the event is paid, the access details should live on a protected page or in another controlled access flow. The public event page should sell the event. The protected page should serve confirmed attendees.
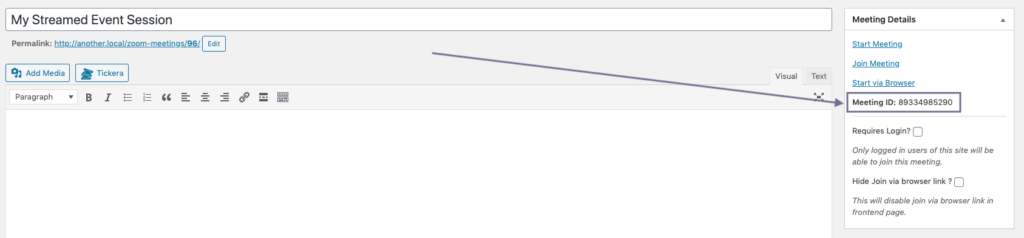
The protected page can include the stream link, password, schedule, speaker notes, downloadable files, replay information, and support contact. This keeps the event instructions in one place and makes it easier to update access details if the stream link changes.
Write Ticket Emails Like Access Instructions
The ticket email is critical for online events. Physical attendees can still arrive at a venue and ask staff for help. Online attendees only have the information you send them. That email should be short, clear, and impossible to misread.
Include the event title, date, timezone, access page link, when the virtual room opens, what to do if the link fails, whether the session will be recorded, and where to get help. If your event relies on WordPress email, also review WordPress email deliverability so ticket confirmations are less likely to land in spam.
Send Reminder Emails Before the Event
Do not rely only on the purchase confirmation. People buy online event tickets days or weeks in advance, then forget where the access link is. Send at least one reminder before the event, and for higher-value sessions, consider sending one reminder the day before and another shortly before the room opens.
| Timing | Message goal |
|---|---|
| After purchase | Confirm ticket and explain where access details live. |
| 24 hours before | Repeat time, timezone, access link, and requirements. |
| 1 hour before | Give the direct next step and support contact. |
| After event | Send replay, resources, or next offer if applicable. |
Test the Buyer Journey End to End
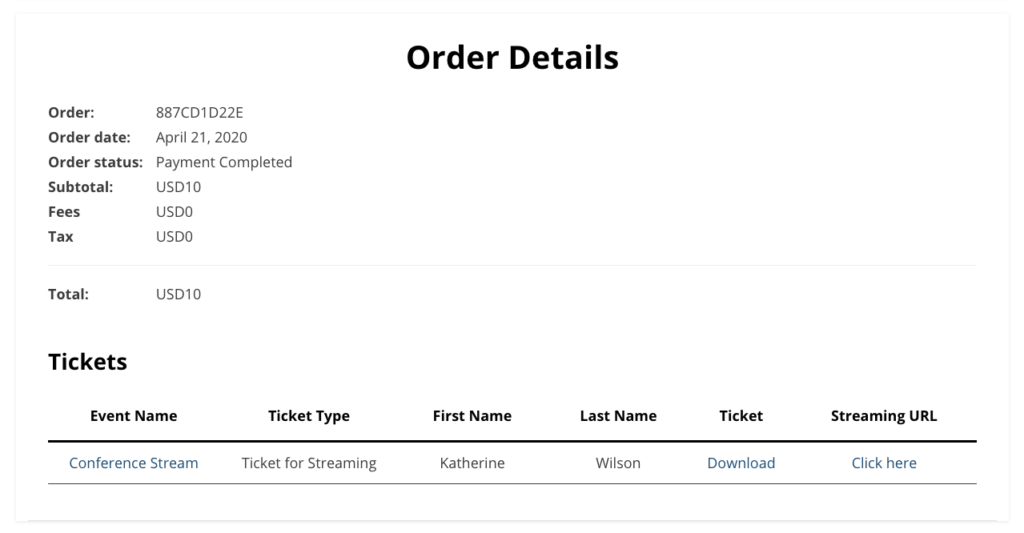
Testing matters more for streamed events because access problems happen at exactly the worst moment: minutes before the session starts. Place a test order, open the ticket email, follow the access page link, confirm the restricted page works, join the stream from another browser, and check the mobile experience.
If your event has many attendees, prepare a backup communication plan. Know how you will notify buyers if the stream link changes, the platform has an outage, or the host needs to move to a backup room. Online events feel simple until one link fails.
Online Event Ticketing Checklist
- Create the streaming room before tickets go on sale.
- Define whether buyers get live access, replay access, or both.
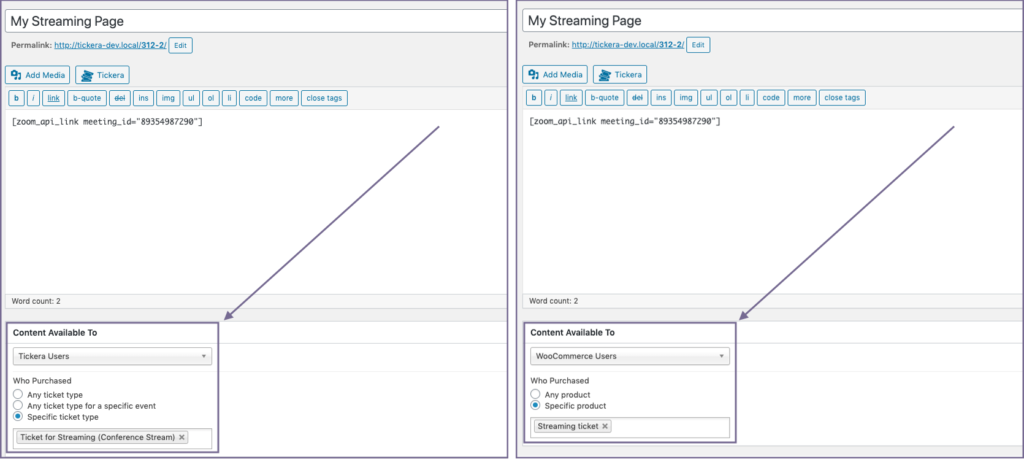
- Create clear Tickera ticket types for each access level.
- Build a protected access page for confirmed attendees.
- Add timezone, joining time, and support details to ticket emails.
- Send reminder emails before the event starts.
- Test purchase, email delivery, access page, and stream login.
- Prepare backup instructions if the stream link changes.
Frequently Asked Questions
Can I sell Zoom event tickets with Tickera?
Yes. Tickera can handle ticket sales, while Zoom or another streaming platform hosts the session. Use a protected access page or controlled email workflow so only buyers receive the joining details.
Should I put the stream link on the public event page?
For paid events, no. Public stream links are easy to share. Keep access details on a protected page, in private attendee instructions, or inside a controlled registration workflow.
What should online event ticket emails include?
Include the event date, timezone, access page link, room opening time, password if needed, replay policy, and support contact. Keep the instructions direct and easy to scan.
Do I need reminder emails?
Yes. Reminder emails reduce missed sessions and last-minute support requests. They are especially important when people buy tickets long before the event date.
Selling tickets for a streamed event is not only about collecting payment. It is about giving buyers reliable access at the right time. Tickera can manage the ticketing side, but the full experience depends on protected access, clear emails, reminders, and testing before the audience arrives online.