When you sell Tickera tickets through WooCommerce, the default WooCommerce product and order areas do not always show enough event context. A ticket called “Regular” or “VIP” makes sense on one event page, but it can become confusing when your shop, cart, order table, or admin email includes tickets from multiple events.
That is why many Tickera users ask how to display event-specific data — such as event title, date, and time — inside WooCommerce areas. With the Bridge for WooCommerce and a few carefully placed hooks, you can make ticket information much clearer for customers and store admins.
Short version: WooCommerce hooks let you display Tickera event data in shop loops, order item names, and WooCommerce emails. Use a snippets plugin or a small custom plugin, test on staging when possible, and avoid editing WooCommerce core files.
Since the release of the Bridge for WooCommerce add-on, many users have asked whether it’s possible to display Tickera data on WooCommerce pages or in its emails. Typical requests include adding an event title or date on the WooCommerce checkout page, or showing that same information in order confirmation emails. These are valid needs, and over the years, we’ve built several small custom add-ons to cover many such cases for premium customers.
Hooking into WooCommerce
WooCommerce has been around for more than a decade. It’s mature, widely used, and runs on millions of websites. One of its greatest strengths-besides being free-is the huge number of hooks and filters it provides. These hooks make it easy to change or extend WooCommerce’s behavior without touching its core code. Everything is clearly documented in the WooCommerce developer docs here.Hooks to the rescue! With just a few lines of code, you can show event titles and dates in key WooCommerce areas.In this post, we’ll focus only on the hooks that Tickera users will find most useful. The following examples rely on PHP snippets. They’re easy to add using the Code Snippets plugin. If you’re unsure how, we have a complete step-by-step guide covering several safe methods.
Display event title on WooCommerce shop page
Let’s imagine you’re selling tickets through your WooCommerce shop. Each ticket type appears as a product on the shop page. This works fine until you sell tickets for multiple events that share the same ticket names (for example, Regular or VIP). In that case, customers won’t know which event each ticket type belongs to.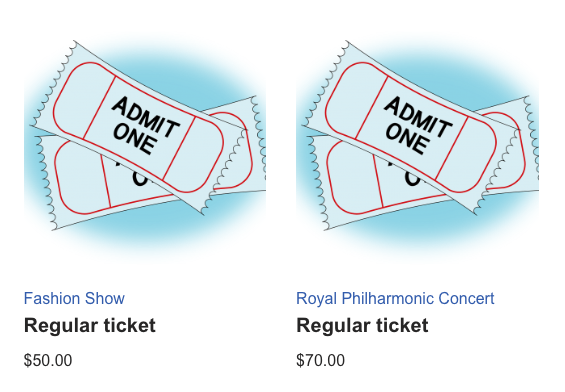 Looks nice, right?
To fix that, we’ll use the woocommerce_shop_loop_item_title hook. The snippet below displays the event title under each ticket type.
Add it via the Code Snippets plugin:
Looks nice, right?
To fix that, we’ll use the woocommerce_shop_loop_item_title hook. The snippet below displays the event title under each ticket type.
Add it via the Code Snippets plugin:
add_action('woocommerce_shop_loop_item_title', 'tc_display_event_data_woo_shop');
function tc_display_event_data_woo_shop() {
$product_is_ticket = get_post_meta(get_the_ID(), '_tc_is_ticket', true);
$event_id = get_post_meta(get_the_ID(), '_event_name', true);
$event_title = get_the_title($event_id);
if ($product_is_ticket === 'yes') {
?>
<td class="ticket-event">
<?php echo $event_title;?>
</td>
<?php
}
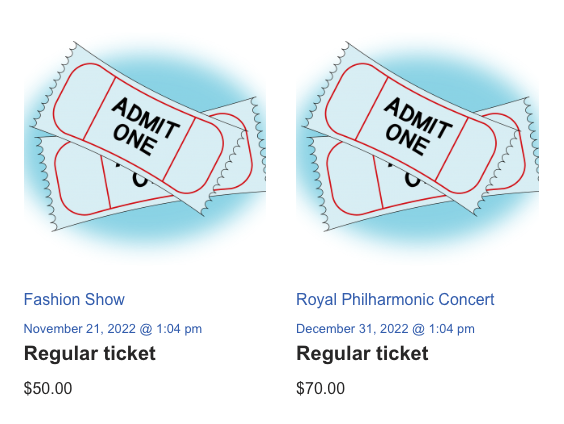
}Adding event date and time
If you also want to show the event’s date and time, use this version instead:add_action('woocommerce_shop_loop_item_title', 'tc_display_event_data_woo_shop');
function tc_display_event_data_woo_shop() {
$product_is_ticket = get_post_meta(get_the_ID(), '_tc_is_ticket', true);
$event_id = get_post_meta(get_the_ID(), '_event_name', true);
$event_title = get_the_title($event_id);
$event_date_time_raw = get_post_meta($event_id, 'event_date_time', true);
$event_date_formatted = date_i18n( get_option( 'date_format' ), strtotime( $event_date_time_raw ) );
$event_time_formatted = date_i18n( get_option( 'time_format' ), strtotime( $event_date_time_raw ) );
if ($product_is_ticket === 'yes') {
?>
<td class="ticket-event">
<?php echo $event_title . '<br/><span style="font-size: 0.8em; line-height: 1.5em;">' . $event_date_formatted . ' @ ' . $event_time_formatted; ?>
</span></td>
<?php
}
} You can easily change where this information appears on the shop page by swapping the hook. For a clear visual reference where you would like to display Tickera data in WooCommerce, you can find a detailed hook position guide here.
Showing event info on single product pages
You might prefer to display the event title and date directly on the single product page instead.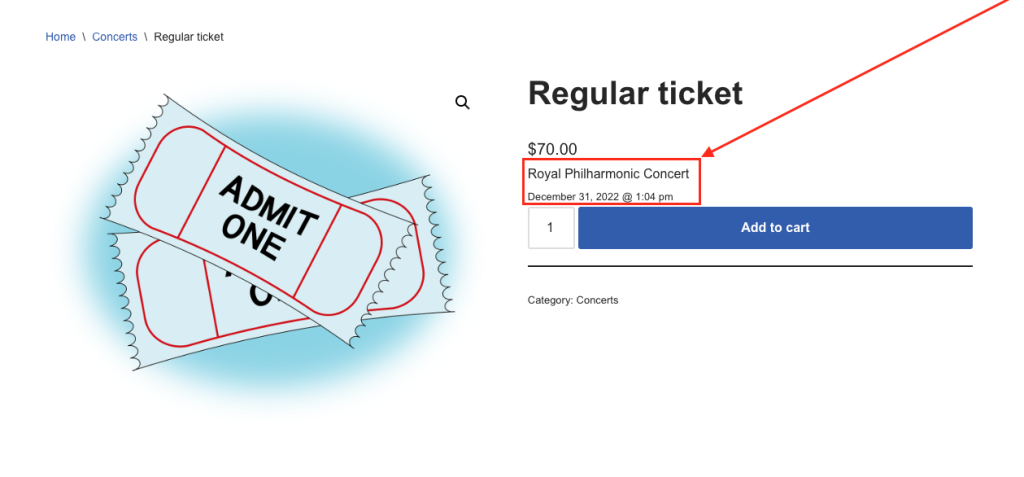 That’s possible with this snippet:
add_action('woocommerce_single_product_summary', 'tc_display_event_data_woo_single');

function tc_display_event_data_woo_single() {
    $product_is_ticket =  get_post_meta(get_the_ID(), '_tc_is_ticket', true);
    $event_id = get_post_meta(get_the_ID(), '_event_name', true);
    $event_title = get_the_title($event_id);
    $event_date_time_raw = get_post_meta($event_id, 'event_date_time', true);
    $event_date_formatted = date_i18n( get_option( 'date_format' ), strtotime( $event_date_time_raw ) );
    $event_time_formatted = date_i18n( get_option( 'time_format' ), strtotime( $event_date_time_raw ) );

    if ($product_is_ticket === 'yes') {
        ?>
        <td class="ticket-event">
            <?php echo $event_title . '<br/><span style="font-size: 0.8em; line-height: 1.5em;">' . $event_date_formatted . ' @ ' . $event_time_formatted; ?>
        </span></td>
        <?php
    }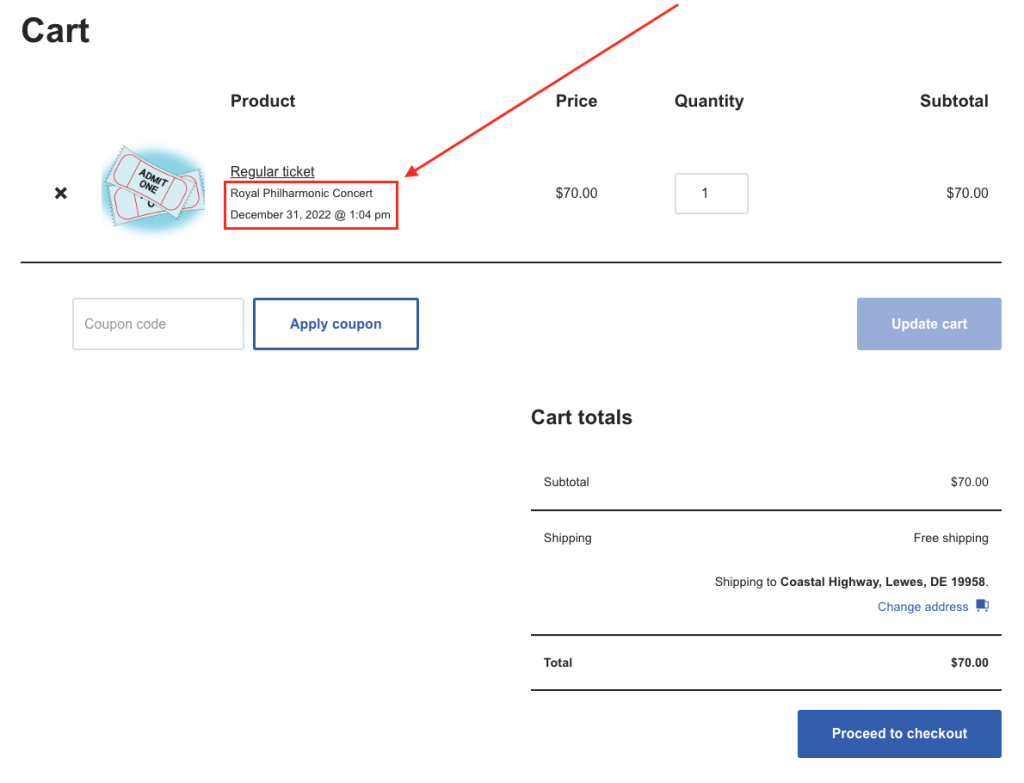
}Showing event data in the cart page
Now that event details appear on the shop and product pages, it’s logical to show them in the cart as well. The cart template behaves slightly differently, but don’t worry-this snippet works right out of the box:add_filter( 'woocommerce_cart_item_name', 'tc_event_title_date_in_woo_cart', 99, 3 );
function tc_event_title_date_in_woo_cart( $item_name, $cart_item, $cart_item_key ) {
$product = $cart_item['data'];
$type = $product->get_type();
$product_id = $product->get_id();
$variation_id = $product->get_parent_id();
$is_ticket = get_post_meta($product_id, '_tc_is_ticket', true);
$is_ticket_var = get_post_meta($variation_id, '_tc_is_ticket', true);
if ($type === 'simple' && $is_ticket === 'yes') {
$event_id = get_post_meta($product_id, '_event_name', true);
$event_title = get_the_title($event_id);
$event_date_time_raw = get_post_meta($event_id, 'event_date_time', true);
$event_date_formatted = date_i18n( get_option( 'date_format' ), strtotime( $event_date_time_raw ) );
$event_time_formatted = date_i18n( get_option( 'time_format' ), strtotime( $event_date_time_raw ) );
if(empty($event_title)) return $item_name;
$item_name .= '<br/><small class="product-sku">' . $event_title . '<br/>'.$event_date_formatted.' @ '.$event_time_formatted.'</small>';
return $item_name;
}
else if ($type === 'variation' && $is_ticket_var === 'yes' ) {
$event_id = get_post_meta($variation_id, '_event_name', true);
$event_title = get_the_title($event_id);
$event_date_time_raw = get_post_meta($event_id, 'event_date_time', true);
$event_date_formatted = date_i18n( get_option( 'date_format' ), strtotime( $event_date_time_raw ) );
$event_time_formatted = date_i18n( get_option( 'time_format' ), strtotime( $event_date_time_raw ) );
if(empty($event_title)) return $item_name;
return $item_name .= '<div style = "width: 100%;float:left;"><small class="product-sku">' . $event_title . '<br/>'.$event_date_formatted.' @ '.$event_time_formatted.'</small></style>';
}
else {
return $item_name;
}
}
Adding event info to WooCommerce emails
When a customer buys a ticket, WooCommerce emails them a table with ticket download links. However, the admin email WooCommerce sends for new orders includes only product names-no event details. If you sell similar ticket types for different events, this can cause confusion. In some cases, this might be mildly annoying, especially if you’re selling tickets that have the same titles but are for different events. So, if you want to display event title and date/time in WooCommerce’s default email table like this: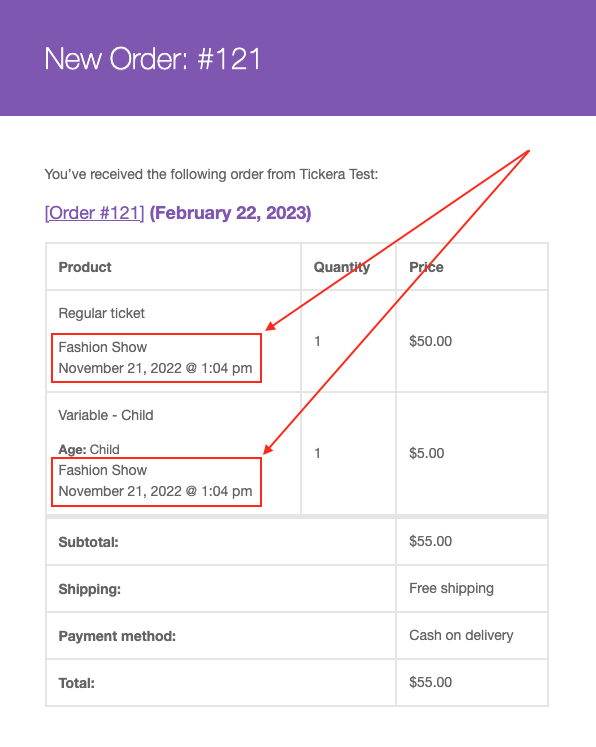 …you can utilize the following snippet:
add_action('woocommerce_order_item_meta_end', 'event_title_in_woo_email_content', 10, 4);

function event_title_in_woo_email_content($item_id, $item, $order = null, $plain_text = false) {

    $product_id = $item->get_product_id();
    $event_id = get_post_meta($product_id, '_event_name', true);
    $event_title = get_the_title($event_id);
    $event_date_time = get_post_meta($event_id, 'event_date_time', true);
    $event_date_formatted = date_i18n(get_option('date_format'), strtotime($event_date_time));
    $event_time_formatted = date_i18n(get_option('time_format'), strtotime($event_date_time));
    $product_is_ticket = get_post_meta($product_id, '_tc_is_ticket', true);

    if (isset($product_is_ticket) && $product_is_ticket == 'yes') {
        echo $event_title.'<br/>'.$event_date_formatted.' @ '.$event_time_formatted;
    }
}
Frequently Asked Questions
Where should I add these WooCommerce snippets?
For most site owners, the safest option is the Code Snippets plugin. Developers can also place the code in a small custom plugin or a child theme, but you should never edit WooCommerce core files directly.
Will these snippets work for every WooCommerce ticket setup?
They are designed for common Tickera + WooCommerce Bridge setups, but every site can have different themes, plugins, and custom checkout changes. Test carefully before using snippets on a live ticketing website.
Why show Tickera event data in WooCommerce emails?
WooCommerce emails often show product names, but ticket names like “Regular” or “VIP” may not identify the event clearly. Adding event title, date, and time helps store admins and customers understand exactly what was purchased.