Using Tickera with Elementor page builder
The world of WordPress is constantly changing and evolving. As a result of that, the ways the websites are built using WordPress are also changing and for the last couple of years, we're witnessing more and more page builders for WordPress. And that's perfectly normal as page builders are making it much more easier for non tech-savvy people to make good looking websites with nothing but dragging and dropping the elements where they want them. And while you may argue whether using page builders for your website is good or not, they are inevitably here to stay.
Now, although there are quite a few notable page builders out there, certainly one of the most popular ones is Elementor. So, in this post, we will be overviewing the possibilities for displaying Tickera content using this page builder and will walk you through the available options.
Displaying Tickera content with Elementor widgets on pages and posts
As you may or may not know, Tickera uses shortcodes and Gutenberg blocks to display its content on your pages or posts. Of course, Gutenberg blocks are reserved for WordPress' Gutenberg editor, so we won't be discussing this part here and will focus on shortcodes. So, how do you use Tickera's shortcodes with Elementor? The most obvious and simple way is by adding the Shortcode widget to the page while editing it with Elementor. So, let's say that you want to display the table of existing tickets for the specific event like this.
First, navigate to the Events area of Tickera in the back end of your website and see the list of your events. You will notice that this table contains the Shortcode column which contains the shortcodes for each event that displays the table of the available tickets for that event.

You can simply copy this shortcode and paste it to the Shortcode widget of Elementor:
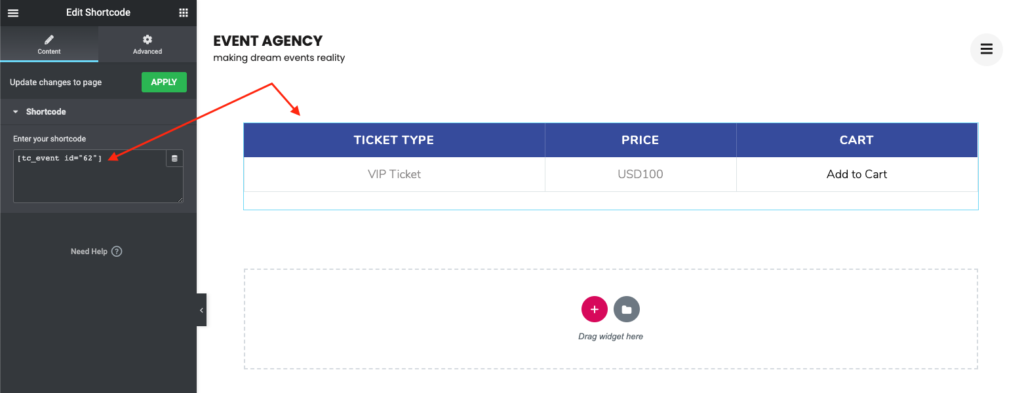
However, there's plenty more information regarding Tickera's events and tickets that you can display with shortcodes. Now, to do this, you would need to use Tickera's shortcode builder (check out our documentation about this here). So, how do you utilize all the goodness of Tickera's shortcode builder with Elementor? The answer is: Text Editor widget. If you place the text editor widget to the page or post that you're editing with Elementor, you will notice that there's a button labeled Tickera on top of the text editor of the widget.
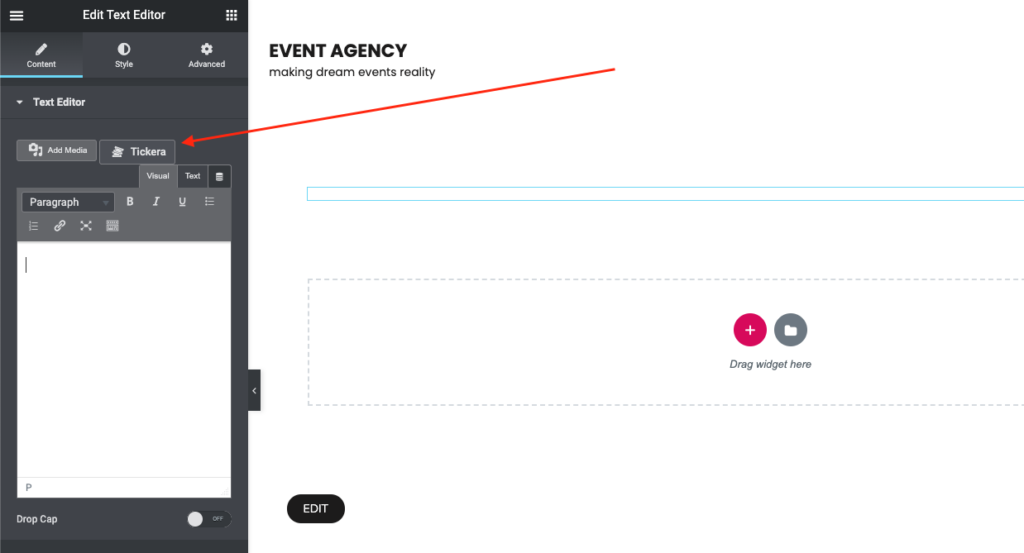
By clicking this button, you will load Tickera's shortcode builder which will allow you to select which information exactly and in which way you want to display and once you're done selecting all the options you want, simply click Insert Shortcode button and the shortcode will be generated for you and inserted to the content of the text widget.
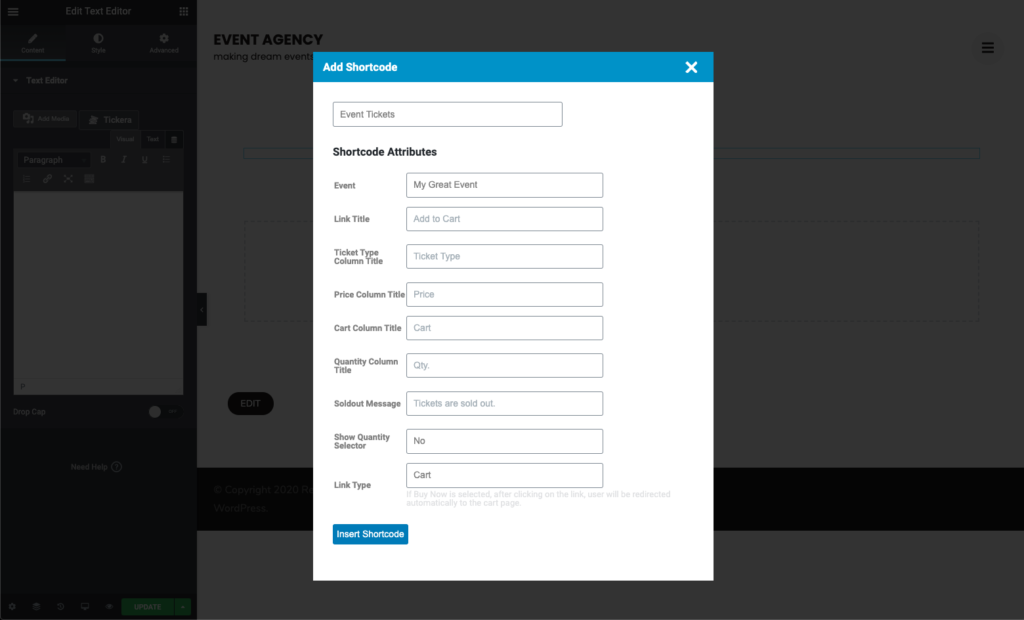
Of course the same text editor widget may contain multiple shortcodes, additional text, media or anything else you see fit, the same way you would edit the content using WordPress' classic editor but with the added features of Elementor.
Using Elementor to edit Tickera's event pages
As you probably already know, each event in Tickera has its own designated page. When creating new or editing existing event, you can enter to the content area anything you see fit and, by default, you can use standard WordPress and HTML formatting to style this information. However, what if you would like to edit this event page using Elementor? Would that be possible too? Yes, sure. To enable Elementor page builder for Tickera's event pages, you should first navigate to Elementor Settings -> General tab and in the Post Types list, check the Events item.
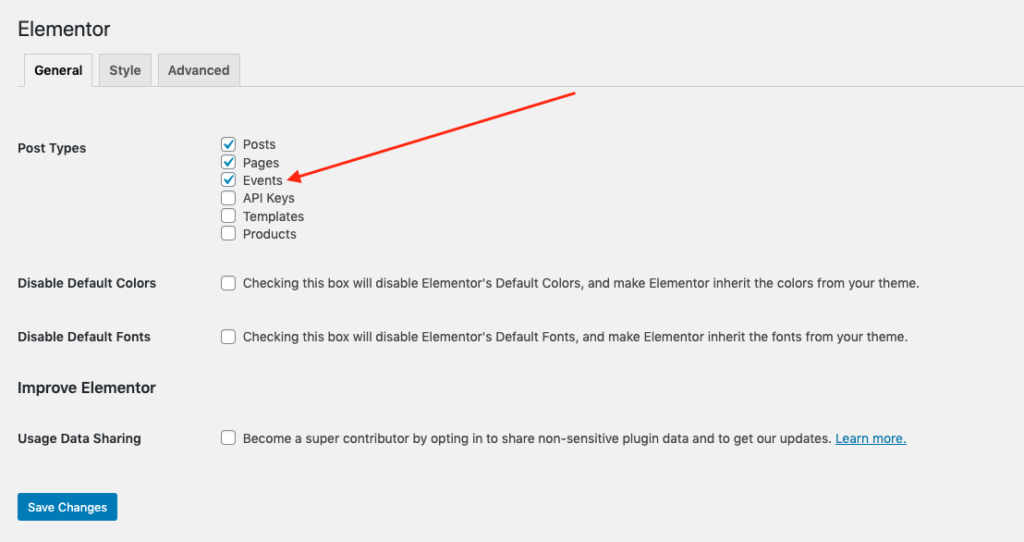
Now, go back to the Events area of Tickera and create new or edit the existing event, and you will notice the distinctive Edit with Elementor button.
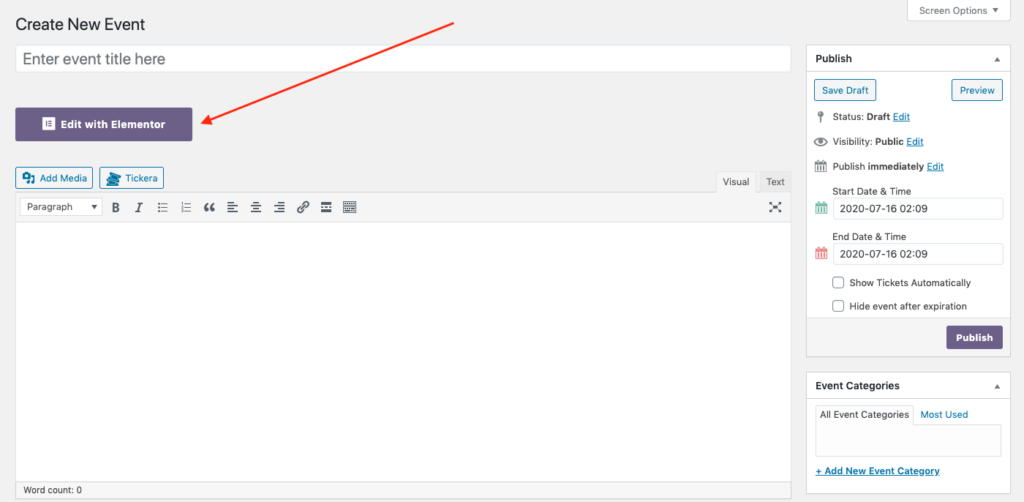
As you may already guess, if you click this button, Elementor page builder will load, allowing you to build the event page just the way you want, using all the goodness available in Elementor plugin. So, just like adding the shortcodes to your pages or posts, you do the same for the event page - using Elementors text editor widget and Tickera's shortcodes. For example, if you want to display sponsor logo, just select Event Sponsor Logo in the dropdown of Tickera's shortcode builder when adding a shortcode to Elementor's text editor widget. And the same goes for all the other stuff such as Ticket/Add to cart button (displays add-to-cart button for the specific ticket type), Event Logo (displays the event logo), Event terms and conditions (displays the terms and conditions you have set for your event), and so on...
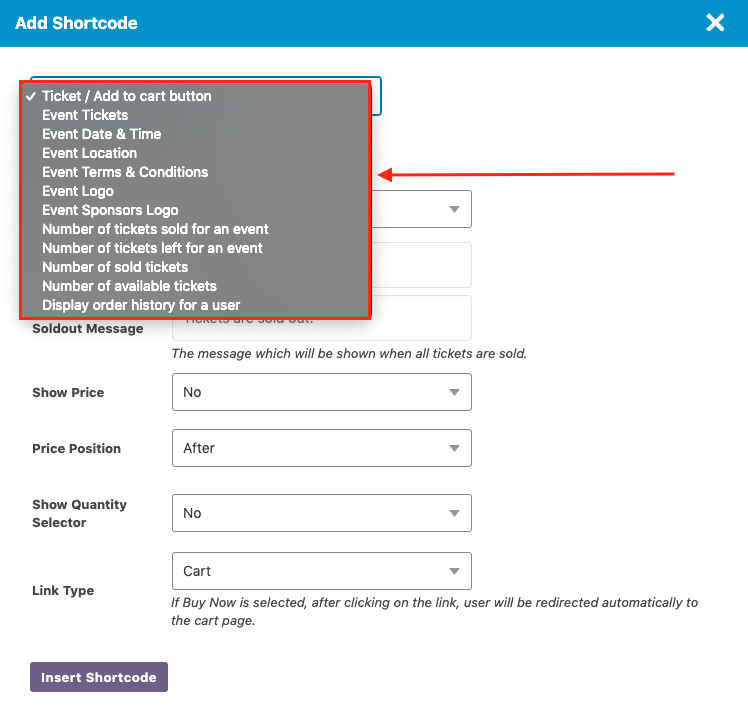
Also, if you're using some of Tickera's add-ons, there might be some shortcodes for displaying the content specific for that add-ons as well. For example, if you're using our Seating Charts add-on, you can use Pick your seats shortcode which will display the button for the customers so they can access specific seating chart.
Now, when you're done building your awesome event page with Elementor, you can go on and add a few finishing touches with Tickera as well. For example, if you check the Show tickets automatically checkbox, a table with all the available tickets will be displayed right below the content that you've built previously with Elementor. Of course, if for some reason this doesn't work for you and you want this table displayed elsewhere on your event page, you can use a shortcode widget in Elementor page builder to which you can simply add a shortcode [tc_event] which will result in tickets table being displayed right where you placed this shortcode.
Conclusion
Elementor is quite popular and very convenient page builder. And with a little bit of fiddling around, you can create quite good looking pages, posts and, as we have seen here, event pages as well, without having to ever delve into the code. Also, Tickera integrates to Elementor builder very well so you can easily display any Tickera related information using Elementor page builder with a few simple clicks.